I have received a lot of private requests for me to provide feedback on the Roasted Right Roaster. To provide a fare and honest review, I wanted to take my time and get to learn the roaster before I provided some feedback. This review will be in depth and hopefully answer many questions you have. If you have questions, feel free to email me at info@ketchcoffee.com and I will do my best to answer your questions.
Let me be clear about why I purchased the roaster to set the stage for what will follow. The sole reason I purchased the Roasted Right Roaster was to be able to be more efficient with my time when it came to roasting for Farmer’s Markets and not for normal day to day operations. For day to day operations, my Coffee Crafters 3E fluid bed roaster is typically adequate. For me, the success of my business did not hinge on my experience with the Roasted Right Roaster.
I want to break down this review into several sections:
- Snapshot about Roasted Right Roasters
- Pre-order experience
- Items that appealed to me about Roasted Right Roasters
- Purchase experience
- Shipping
- Assembly
- Initial impressions
- Problems
- Roaster performance
- Expectations versus reality
- Customer service
- Would I recommend Roasted Right Roasters?
Snapshot about Roasted Right Roasters
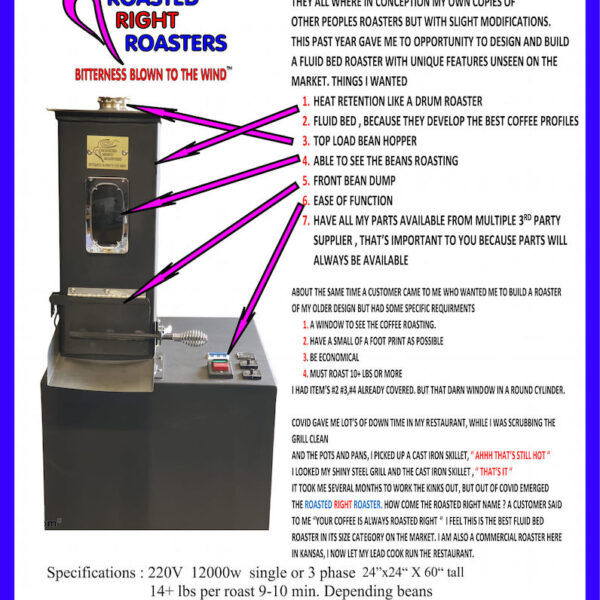
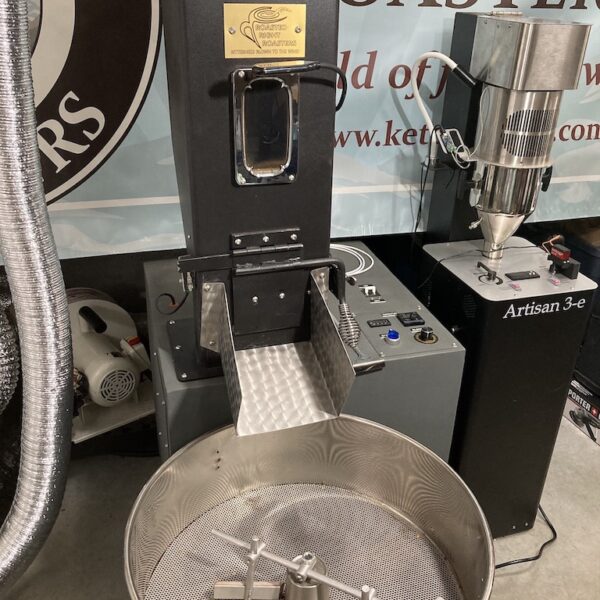
The Roasted Right Roaster is a 14-pound, closed chamber, electric fluid bed roaster manufactured by Marty Hotes out of Clyde, Kansas.
The roaster requires a dedicated 60 amp 220 volt circuit with a recommendation that the roaster be operated on a dedicated 70 amp 220 volt circuit.
The roaster is heated by 12,000 watt heating elements that have a 50 amp draw.
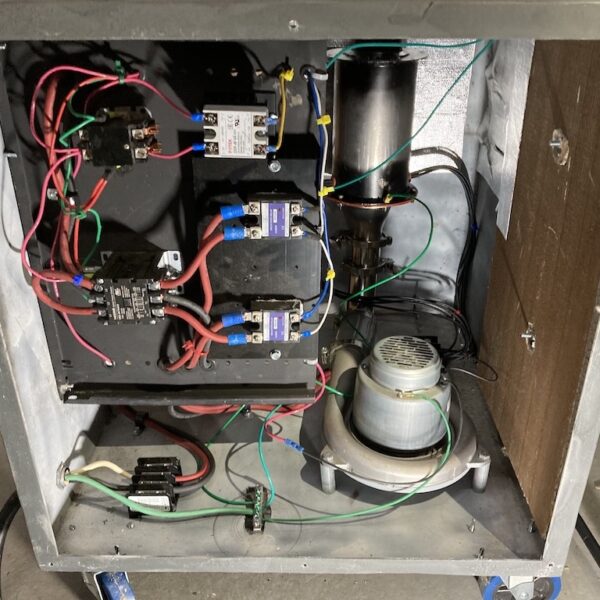
The roaster is equipped with two digital 80 amp Auber SSRs and the heat is controlled via an Auber digital heat controller rather than an analog resistance based SSR and potentiometer.
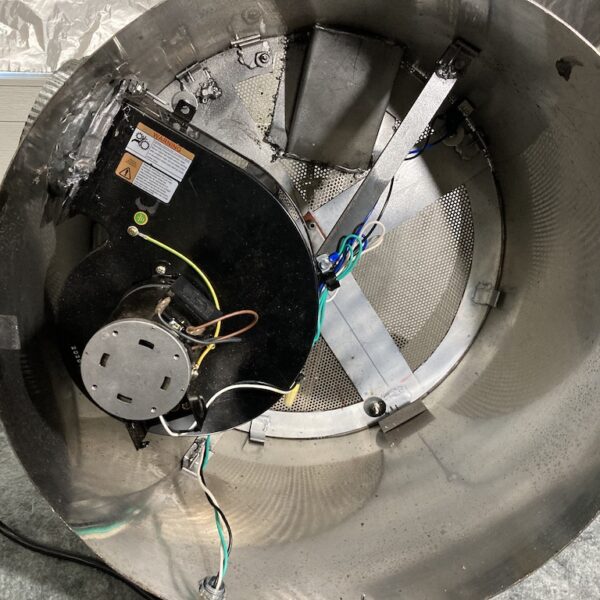
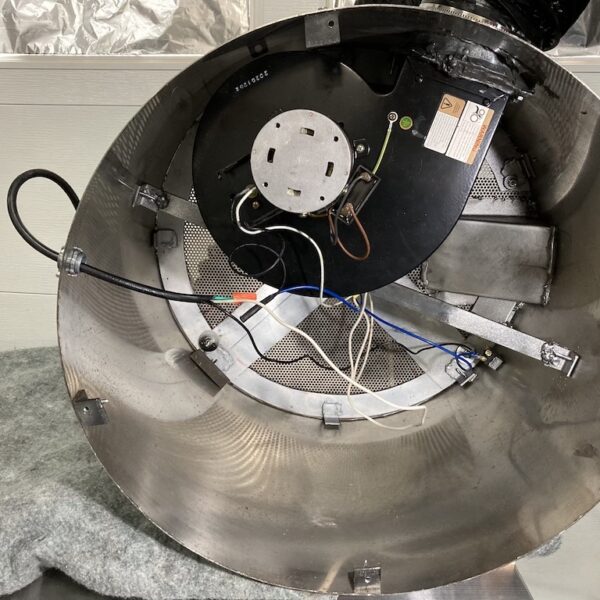
The roaster does not have an external exhaust blower. It has one loft blower, which is an Ametek 122165-00 AC blower that has a 7.8 amp max draw. Marty has repeatedly marketed this blower as brushless, but it does in fact have brushes. Here is a link to a spec sheet about the blower. Ametek markets the brushes as their “Infinity” or “Eternity” brush system lasting 1500-3000 hours.
The roaster came equipped with one 2.8 mm (not 3 mm) Auber thermocouple that monitors bean temperature and is tied to a digital temperature display that also functions as a high temperature safety cut off.
Pre-order experience
Like many in the fluid bed community, the first and only time I heard about the Roasted Right Roasters was when Marty Hotes promoted them on the various Facebook coffee groups.
When I began my online research on the Roasted Right Roaster, I was a little surprised to learn that there was no website dedicated for the advertisement and sale of Roasted Right Roasters.
There is only a Facebook business page that offers a one page product overview of the Roasted Right Roaster (https://www.facebook.com/roastedright).
The product information page is out of date and contains some inaccurate information. I will discuss a few of those details now and a few later in this review.
The current price for the roaster on the product page is $5100. The price at the time of the purchase in 2022 was $6500.
The price included only the roaster. It did not include a cooling tray, which at the time of purchase was an additional $1500.
The height of the roaster is listed on the product page as 60 inches. My roaster is 73 inches tall with the green coffee hopper attached and 62.5 inches tall without the hopper.
The base is listed as 24 inches squared. The base measured 24 1/4 inch deep by 24 1/8 inch wide, and 24 1/8 inch tall. With the discharge chute on the front of the roaster attached, the footprint of the roaster increases to 31 inches in depth.
Most roaster manufactures offer exhaust ductwork solutions that are compatible with their roasters. This is not the case with Roasted Right Roasters. The purchaser is left to figure out the exhaust ductwork themselves.
There is no warranty information or return policy listed on the Facebook page.
Items that appealed to me about Roasted Right Roasters
One question I get often is, “Given the lack of pubic information about the Roasted Right Roaster, what factors led to your decision to give it a chance?” There were three main features that appealed to me.
The first feature that appealed to me about the Roasted Right Roaster was that it is a closed system fluid bed roaster in contrast to the open system commercial fluid bed roasters on the market where the top of the roast chamber is open. There were three primary reasons this appealed to me.
The first reason a closed roast chamber appealed to me was that I found I had to wear respiratory protection around open chamber fluid bed roasters to avoid respiratory irritation as they seem to put off a lot of particulates in the air. I wanted to go back to a closed system roaster to avoid this.
The second reason a closed roast chamber appealed to me was that I wanted to avoid the common problem of green coffee blowing out open roast chambers either onto the floor or into your batch of roasted coffee nearby in the cooling tray. With a closed system or enclosed roast chamber, you completely avoid this issue.
The third reason a closed roast chamber appealed to me was that I assumed it would be more heat efficient. With an open chamber roasting system my assumption was that ambient air temperature would likely have more of a negative impact on the roasting process compared to a closed system roaster. My underlying assumption was that the heated air coming from the air inlet would have to not only heat the green coffee but also the ambient air in the room that was entering the roast chamber. With a closed chamber roast system, the only air entering the roast chamber would be heated air via the air inlet.
The second feature that appealed to me about the Roasted Right Roaster was that the roaster was built out of carbon steel rather than stainless steel. This appealed to me for two related reasons.
First, I suspected that the carbon steel would likely retain a significant amount of heat energy through preheating or through the roasting process. With traditional single pass fluid bed roasters (or drum roasters), only a fraction of the heat is absorbed by the coffee. The rest goes into the roasting room or out the exhaust. This is of course why the exhaust air temperatures are so high. Second, with the Roasted Right Roaster, the hope would be that the heat energy stored in the carbon steel roast chamber would impart an appreciable amount of conduction to the roasted coffee as the coffee comes into contact with the carbon steel surface during the roasting process. Many fluid bed roasters will find this point to be controversial and will argue that fluid bed roasters ought to be purely convection roasters. When I transitioned from roasting coffee on a drum roaster with a carbon steel drum to a fluid bed roaster with a stainless steel open roast chamber, I found I could match the flavor profiles I was accustomed to on my drum roaster until I hit the medium-dark roast territory. From this point on, I found that the air roasted coffee seemed to be missing a little bit of nuance and body that I assumed was coming from the conduction of the drum roaster.
The third feature that appealed to me about the Roasted Right Roaster was that the roaster did not incorporate an external exhaust blower. This appealed to me for three reasons. First, by eliminating an external exhaust blower it reduces costs and the footprint of the roaster. Second, since the roaster only uses a loft blower that is prior to the heating elements for both the loft and the exhaust, it reduces maintenance. Since exhaust blowers are downstream of the roasted coffee, the blades on the blowers get covered in dust and oils/creosote requiring periodic disassembly and cleaning. Third, since the roaster does not incorporate external exhaust blowers, the hope was that it would be less noisy than other fluid bed roasters with external exhaust blowers. One other feature that I will mention and come back to is that the blower was marketed as being “brushless” and longer lasting than standard “brushed” AC blower motors.
The fourth feature that appealed to me about the Roasted Right Roaster was the economics. There are no commercial 6 kilo (14 pound) fluid bed roasters on the market coming in at $6500-8000. The closest competitors cost more for less roasting capacity. The Coffee Crafters XE costs are $10,000 with a max capacity of 10 pounds. The ASHE 11-pound roaster costs around $13,000. This is not to make any form of quality comparison between the roasters. Often in life you get what you pay for.
Ordering/purchasing experience
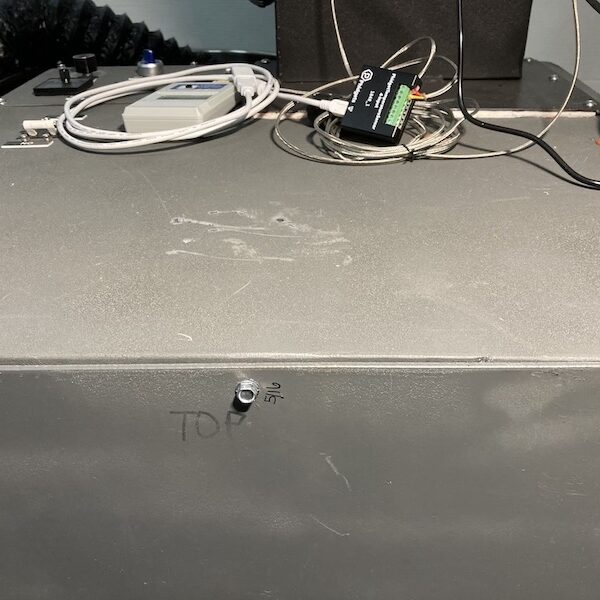
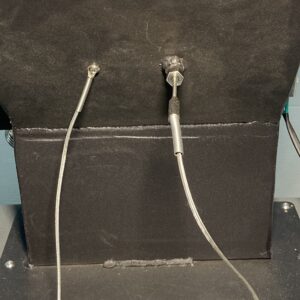
While the roaster comes with a bean temperature thermocouple, I wanted to collect more data with this roaster. Marty agreed to add the following thermocouples for a fee: 1) an air inlet thermocouple; 2) an environmental or exhaust air thermocouple; and 3) a bolt-on thermocouple that would attach to the lower exterior of the roast chamber and allow me to track the temperature of the roast chamber.
At the time of my purchase, there were a couple of powder coating options. I went with black.
I also requested that he add a trier spoon to the roaster. This was something he was not able to figure out prior to shipping.
I ordered a second set of heating elements to have on hand just in case to minimize any future downtime.
On 08/30/2022, I made the required 50% downpayment on the total balance with the understanding that I would pay the remaining 50% once the roaster and cooling tray were built.
The forecasted production time was three weeks.
The roaster and cooling tray did not ship until 11/30/2022.
Shipping
Marty was very accommodating when it came to the shipping and here I will say his customer service was great.
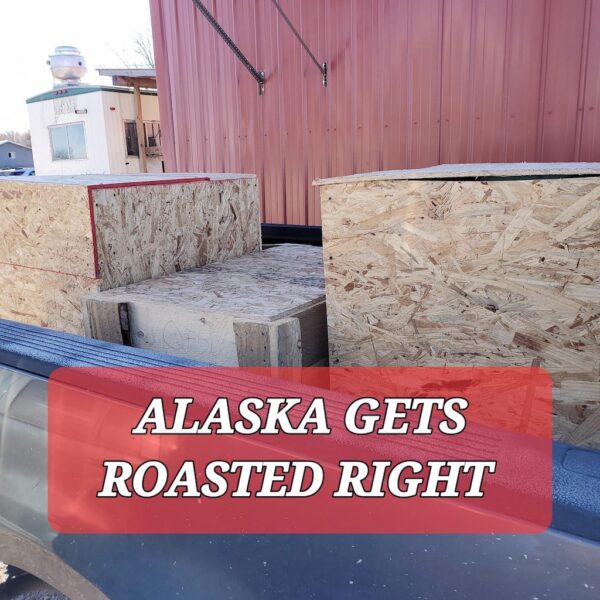
The roaster normally ships in one crate, but Marty agreed to disassemble the roaster and ship it in two crates so that I could ship with Alaska Air Cargo, which is normally a very fast and reasonably priced cargo shipping method. The cooling tray would be shipped in a third crate.
Marty also delivered the roaster to the shipping facility, which was not nearby.
The crates were marked with the information I requested to ensure painless shipping. This has not always been my experience with other well know companies and has caused me a lot of headache.
Maximum crate dimensions were provided at the time of order and confirmed prior to crating, and the crates were initially made out of spec and had to be altered prior to shipment.
At this point in my coffee roasting journey, I have ordered two other commercial pieces of coffee equipment that came in crates. Those crates were similarly constructed and had a very professional appearance.
The crates that the Roasted Right Roaster and cooling tray came in lacked the professional appearance (i.e., form) I was accustomed to, but functionally they worked. In fairness, I knew what to expect on the crating based on other photos on the Roasted Right Facebook page of crated roasters being shipped out to customers, but it was something commented on by the freight handlers when the items were delivered to me.
Assembly
I was told that it should only take me less than thirty minutes to assemble the roaster. Well, that wasn’t the case for me. It took me several hours to uncrate and assemble the roaster. If you have to assemble the roaster, do yourself a favor and have another person available to assist with the uncrating and assembly. Again, to Marty’s credit he was very responsive to questions I had along the way when it came to assembly.
Initial impressions
From an aesthetics perspective, my initial perspective was that the roaster lacks the fit and finish of other commercial roasters I have owned and looks like a very heavy-duty homebuilt roaster.
Marty himself is very clear in his online social media comments about his roasters that he emphasizes function over form, and you can clearly see photographs and videos of his roasters on the Roaster Right Facebook page. So, the roaster was what I expected in this sense.
I found that the powder coating easily scratched off in places.
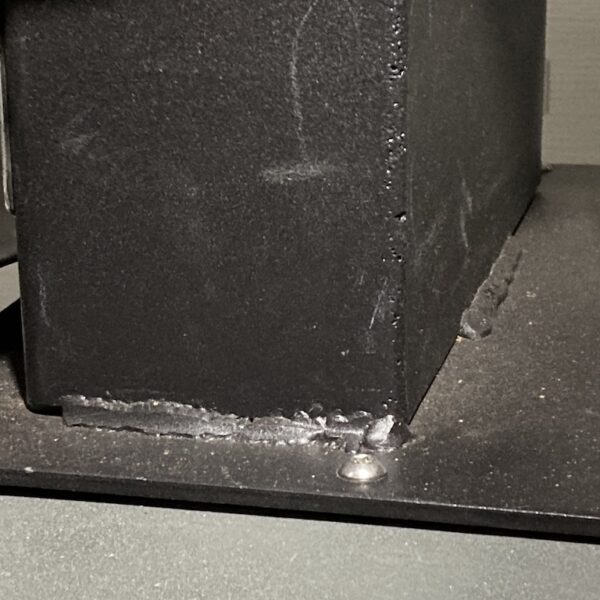
The welds on the roaster do not appear professionally done and for whatever reason the welds only cover partial sections of the joined metal. I assume this is a form over function issue, but it is a small detail that I have found repeatedly undermines confidence in the overall build quality to independent observers.
The parts of the roaster that come apart are primarily held together with self-tapping metal screws. The internal components in the base unit are also held in place with self-tapping metal screws. Many of these screws are sticking out of the bottom of the base unit and they are extremely sharp. This is something to be aware of when you remove the base unit from the crate. One down side to the self-tapping screws is that they are a bit cumbersome to screw in and out. The other down side is that they just don’t look as professional.
The roaster comes with nice castor wheels to roll the roaster around. I really appreciate this detail.
Problems
In addition to various professionally made home coffee roasters, I have now owned two commercial coffee roasters. While I did have some minor problems with those roasters over time, both roasters were essentially plug in and roast ready on receipt. This was not my experience with the Roasted Right Roaster or the cooling tray. Marty assures me that I am the only customer he has had with the level of problems I have had.
First crack detection: While I will momentarily discuss some electrical and mechanical problems, one of the first problems I want to discuss is the inability to hear first crack on the Roasted Right Roaster. To be clear, there are other fluid bed or hot air drum roasters on the market where you cannot hear first crack such as Loring or Sivetz to name just two, but they are transparent about this. The first time I learned that first crack was not detectable on the Roasted Right Roaster was when I was roasting on it. I tried a variety of approaches to hear first crack from the exterior of the roaster that did not work. This was the first roaster I had ever roasted on where first crack was not detectable, and for my roasting style as a profile roaster this was a major problem. After some back and forth with Marty on this issue, he agreed to continue working on building a trier spoon as he claimed he could hear first crack through his test trier spoon holes. As of April 2023, he never produced a working trier spoon.
I then tried a variety of nondestructive ways to gain access to the roast chamber to try and hear first crack, which did not work. I ultimately settled on using high temperature silicone tubing attached to a stethoscope, which I ran down into the roaster through the green coffee loading blast gate. I found that as long as I kept the tube on top of a deflection shield located under the loading gate and out of the flow of moving coffee I could hear first crack. I started with 1/8 inch tubing and then increased that to 1/2 inch tubing as I found that the larger tubing increased the volume so to speak. This allowed me to adjust the placement of the bean temperature probe so that first crack was occurring near my target temperature. I then used a temperature offset feature in Artisan Scope software to fine tune the reading of the probe so that first crack occurred at my desired temperature. This has allowed me to use profiles on the Roasted Right Roaster that I have fine tuned for my Coffee Crafters 3E fluid bed roaster with very minimal changes. The downside to this approach is that some chaff blows out the open green coffee chute. That being said, once I know where first crack is occurring for each coffee, my approach is to auto mark first crack with Artisan Scope, which means there is no need to listen for first crack. I simply follow the profile and do my quality control measures to ensure that the coffee is within desired specs for my target profile.
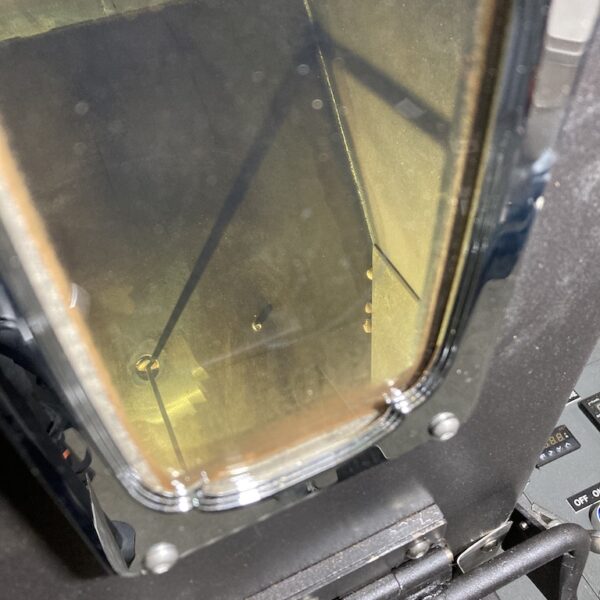
Stuck coffee: There are two locations inside the roaster where coffee consistently gets stuck during roasts. You have to be mindful to check these locations and dislodge any unroasted coffee to prevent it from getting mixed in the next batch. The first location is between the bean temperature thermocouple and the hole where it enters the roast chamber The second location is along the bottom sides of the roaster where there are plates installed to provide the desired shape to the lower portion of the roaster chamber. There are unwelded seams between these plates and the roast chamber that coffee beans get stuck in.
Coffee discharge chute: The discharge chute where the roasted coffee exits the roaster and goes into the cooling tray did not fit properly. There was around an 1/8 inch gap between it and the roaster resulting in some roasted coffee falling between the gap to the floor or getting stuck in the gap. Marty had me take some measurements, and he built and sent me a new one at no cost. The new one came without holes predrilled. The explanation given was that he custom makes these for each roaster and the hole patterns are not the same for all Roasted Right Roasters. The idea I came up with was to use a thin piece of cardboard as template to determine the hole pattern on the roaster, mark it on the new chute, and drill it.
Thermocouples: I paid for the roaster to come with four ungrounded thermocouples as ungrounded thermocouples are required to avoid ground loops. The roaster came with one ungrounded Auber bean temperature thermocouple and one grounded Auber bolt-on thermocouple. The roaster had the mounting nut installed on the top end of the heating element chamber, but was missing the thermocouple. The exhaust air/ET thermocouple mounting nut and thermocouple were both missing. Since I had other 3 mm Phidget thermocouples on hand, I attempted to instal one and learned that even though Auber markets their thermocouples as 3 mm they are actually 2.8 mm. I would have to drill out the locking nut in order to get it to accommodate 3 mm thermocouples. I also contacted Auber regarding the issue of grounded and ungrounded thermocouples, and was shocked to learn that they do not intentionally manufacture grounded or ungrounded sheathed thermocouples. They manufacture the thermocouples in a generic manner and then test them with a multi-meter to determine if they are grounded or ungrounded.
The recommended BT thermocouple depth setting was to have the probe in the hot air stream resulting in abnormally high and inconsistent first crack temperatures in the range of 460-480F. I had to adjust the probe depth over a series of roasts to dial the probe placement so that first crack was occurring at temperature I desired so that I could match profiles with my 3E fluid bed roaster.
Heating elements: Toward the end of the manufacturing process of the roaster, Marty notified me that porcupine heating elements he received for the roaster were out of spec and running at a higher wattage than his normal porcupine heating elements (14,000 watts), and warned that they could possibly trip the 60 amp circuit breaker on the roaster if the heat was turned up past 90%. I requested that he test this prior to sending the roaster, which he did not do stating he does not roast with the heat that high. Ultimately, I discovered that I could not roast more than ten pounds of coffee without tripping the circuit breaker on the roaster. Unfortunately, the first time this happened to me I had a three and half pounds of roasted coffee in the cooling tray when the breaker on the roaster tripped with ten pounds of green coffee in the roaster. Once the breaker tripped, the roaster lost all power and the coffee lost all loft. To avoid a fire, I had to dump the coffee into the cooling tray with the roasted coffee. Separating the green from the roasted coffee was a nightmare. Marty remedied this issue at his own cost by building and shipping me a new heating element chamber that used a different style of heating elements that were lower wattage (12,000 watts) and would not trip the breaker. I had to uninstall the old heating elements, and install and wire the new elements to the roaster. I found I needed a second set of hands to complete the wiring. The new heating elements solved the problem of tripping the circuit breaker on the roaster, but less wattage means less heat output. Less heat output negatively impacts roaster performance.
Cooling tray: By far, the most serious and potentially dangerous problem I had was with the cooling tray. Let me be clear from the outset that I am not an electrician and have very limited competency when it comes to electrical wiring. When I plugged the cooling tray into an outlet it immediately tripped my GFCI outlets. Marty was easy to get on the phone and on Facebook video chat and started trying to help me diagnose the problem. I took the bottom off the cooling tray (held together by self-tapping metal screws) and started working using a multimeter to test the wiring. A cut was found on the power cord and the initial assumption was that the cut was causing a short. Marty had me cut the cord, strip the outer insulation back, and then wire the three strand power cord per his instructions. When I plugged in the cooling tray to test it, it again immediately tripped the GFCI outlet. Marty had me remove the dedicated green ground wire and plug in the cooling tray to test it. It did not trip the GFCI outlet. Marty recommended that I use the cooling tray and informed me that he would be sending me a new power cable. I used the cooling tray until early January 2023, but stopped using after receiving guidance from multiple trusted sources that the risk of electrocution was high given the current wiring.
Around the end of January 2023, I received the new power cord along with the new heating elements. Marty had me wire the new power cord differently than his original wiring configuration to accommodate my GFCI outlet. Upon plugging in the cooling tray, it immediately tripped the GFCI outlet. Marty insisted my outlet wiring was the problem rather than the cooling tray. I had operated out of this space for nine years with multiple pieces of coffee roasting equipment without problem so this made me skeptical. After some back and forth, I insisted on having an electrician inspect the cooling tray wiring. Marty agreed and paid for a local repair technician to do the work. The repair technician determined the cooling tray was wired incorrectly and rewired it. The cooling tray now does not trip the GFCI outlet.
A second problem I had with the cooling tray was that it was crushing the coffee. This again was a quality control issue that should have been caught prior to shipping. The primary problem turned out to be a bushing was not cut even and coffee was getting caught under a center collar and being crushed. Fixing this improved the issue, but did not completely fix it. A secondary problem that seems to be contributing to coffee still being crushed is that the cooling tray surface itself is not even. As the arms rotate around the tray, you can visually see that there are high and low spots. Measurements also confirmed this.
A third problem with the cooling tray is that the 310 CFM blower motor on the cooling tray doesn’t cool the coffee as quickly as I would hope. Large batches of coffee are typically hotter to the touch than I am accustomed to four to five minutes after being dropped in the cooling tray. The exterior of the cooling tray gets extremely hot and likely hot enough to burn exposed skin with any prolonged contact. I have come up with an idea to capture how quickly the coffee cools and will update this section after I gather some data. Marty states that it is possible to replace the blower with one with a higher CFM rating. Just for comparison sake, the Grizzly blower on my 3E has a CFM rating of 550.
Hopper capacity: The last thing I want to mention in this section is the green coffee hopper capacity is roughly seven pounds even though the maximum batch size of the roaster is fourteen pounds. Conceptually, this initially really frustrated me; however, if you view the hopper as a funnel it is less of an issue as it only takes around twenty-seconds to load fourteen pounds of green coffee. I myself use a five gallon food grade bucket to load the coffee. I am roughly six feet in height and can barely load the coffee into the hopper from the ground. Many will find the use of a small step ladder or stool helpful when loading green coffee. This is something you will have to take into account to make sure your ceiling height is compatible with this roaster.
Roaster Performance
In this section, I want to discuss the roaster’s performance. For those who are end temperature roasters rather than profile roasters, the Roasted Right Roaster has more than enough power to roast fourteen pounds of coffee in a reasonable time period even with the lower wattage heating elements. With a preheated roaster and with the burner set to 100%, I found that the roaster could roast fourteen pounds of coffee reaching first crack at 10:00 and second crack by 13:30. This is more than acceptable for those who use this roasting style.
For those who profile roast, I have found that the Roasted Right Roaster can reliably roast ten pounds even with a cold roaster. I have found that it cannot profile roast twelve pounds even with a preheated roaster. As of the writing of this review, I have not tried an eleven pound profile roast, but I suspect that will be the upper limit when it comes to profile roasting on the Roasted Right Roaster. I will update this section when I have more data.
While I am on the subject of a cold versus a preheated roaster, I have come to change my mind about the value and role of preheating fluid bed roasters. In the past, I used to dismiss the value of preheating a fluid bed roaster. It was not until I began doing some testing with the Roasted Right Roaster on this subject and comparing the results with Jason Scott who was doing the same on the Coffee Crafters XE that the value became obvious. Set aside the issue of potential added conduction on the Roasted Right Roaster, the one thing we discovered was that you could roast more coffee with a preheated roaster than with a cold roaster, which makes sense as the entire roasting system is preheated and doesn’t have to come up to temperature. For the Roasted Right Roaster, I could not profile roast twelve pounds with a cold roaster. The roaster simply did not have enough heat output to do it. Around dry end, the RoR started to decline. Even going to 100% burner, the roaster steadily lost RoR and barely had enough momentum for the roast to reach first crack at 14:30 and had to be stopped soon thereafter as it reached a 0F rate of rise. With a preheated roaster and with twelve pounds of the same coffee, the results were starkly different. While the roast again started to loose RoR around dry end, with the burner set to 100% the roaster was able to hit first crack at 11:56 and second crack at 14:01. This and other tests I did showed the clear benefits of using a preheated roaster. Jason Scott has similar results with the XE.
Expectations versus reality
So, how does the Roasted Right Roaster fare on some of the initial features that attracted me to it: the closed system roast chamber, the carbon steel roast chamber, the lack of an external blower, and the purchase price per roast capacity?
Hands down I favor the closed roast chamber system of the Roasted Right Roaster and others like it over open roast chamber systems when it comes to air quality. That being said, when I have to have the green coffee chute open to hear first crack, air quality is slightly diminished as chaff blows out the roaster. Even so, I have not had any respiratory issues not wearing respiratory protection. I suspect it is because the chute is only open for a limited window of time to hear first crack and the green coffee dust is blown off much earlier in the roast.
When it comes to the issue of green coffee escaping the roasting chamber, this is another win for the closed roast chamber system of the Roasted Right Roasters. Another related benefit to such roasters is that the loft can be set higher and within minimal attention, which is in stark contrast to open system roasters.
When it comes to the topic of heat efficiency and less negative impact from ambient air temperature, this is an assumption that I have neither proved or disproved, but it seems likely that closed roast chamber systems should out perform open roast chamber systems in this area.
Regarding the heat retention properties of the carbon steel roast chamber, the Roasted Right Roaster is somewhat slow to absorb heat, but once it does it retains heat for a significant period of time. Starting with a cold roaster, it takes around 03:30 to get to 100F, around 08:30 to get to 200F, around 12:30 to get to 300F, and is consistently around 330F when I end the roast for most medium-dark profiles with a drop bean temperature around 448F. This of course is going to vary based on your roast profile. Five minutes after ending the roast and with the loft blower still running to cool down the heating elements, the roaster chamber temperature will have only dropped to 250F. To try and have some baseline for comparison with the 3E, even though an imperfect one, I decided to insert my multi-meter’s K-type beaded thermocouple about a 1/4 inch inside a sidewall thermocouple mounting nut on the 3E roast chamber so that I could track the heat transfer during a roast. Starting with a cold roaster, it takes around 02:00 to get to 100F, 06:00 to get to 200F, 12:00 to get to 300F, and I dropped the medium-dark roast at 13:00 at 448F with the multimeter temperature staying around 300F. I then recorded the following temperature measurements following the end of the roast while the loft blower ran to cool the heating elements down: 205F at 01:00, 150F at 03:00, 107F at 05:00, and 80F at 07:00. While this is not an exact comparison, what you can see from this imprecise experiment is that the carbon steel roast chamber of the Roasted Right Roaster retains much more heat than the stainless steel roast chamber of the 3E.
When it comes to the impact of preheating the carbon steel roaster chamber of the Roasted Right Roaster, the one thing I can say definitively is that there is tremendous benefit seen in terms of roaster performance. On the subject of how much conductive heat transfer is occurring, this is difficult to answer. The only way I know to quantify the amount of conductive heat transfer taking place is to compare the amount of heat loss captured by the bolt on thermocouple following the charging of green coffee into the roaster as well as comparing the initial heat settings required to get the same amount of coffee on profile with a cold roaster. Here I will reference the previously mentioned two twelve pound roasts. The roast that was with a preheated roast chamber was charged with a bolt-on thermocouple reading of 343F. It only took an initial heat setting of 60% for the roast to stay on profile before having to increase the heat around 03:30 mark to stay on profile. The bolt-on thermocouple reading at this point was 227F. In contrast, the heat had to be set to 100% around 1:30 on the twelve pound roast with the cold roast chamber to get the roast on profile and as previously mentioned the roaster lacked the ability to successfully complete the roast. Even though the preheated roast chamber roast was far from technically perfect, the most likely explanation for why the roaster was able to successfully bring the roast to second crack was ultimately due to the built up thermal mass in the roast chamber. Rather than having to solely rely on convective heat transfer after charging the coffee, the preheated roast chamber was also able to conductively transfer heat to the coffee. That combination made all the difference between the two roasts.
There will be some who will retort that the heat energy is being wasted by being absorbed into the roast chamber rather than by the green coffee. This sounds plausible until you realize that a large percentage of the heat of any single pass roasting system is not absorbed by the coffee and passes through the roast chamber before exiting the exhaust system. Rather than wasting the heat energy, the Roasted Right Roaster retains and reuses a portion of what would otherwise be exhausted out the roaster. For me, this is a huge benefit.
On the question about the conductive heat transfer properties of the Roasted Right Roaster as it pertains to flavor, I currently do not detect any appreciable difference in flavor between coffees roasted on my Coffee Crafters 3E with its stainless steel roast chamber and the Roasted Right Roaster. To be clear, I am referring to roasting the same coffee using the same roast profile and matching the same end color with a color meter. This of course was the goal in terms of matching roast profiles between the two roasters, but I assumed there would be a more apparent flavor difference.
On the subject of the Roasted Right Roaster not having an external blower, so far I could not be happier. The Roasted Right Roaster is appreciably quieter than my 3E. From a decibel reading perspective, the difference is not tremendous with the 3E coming in at 77 decibels and the Roasted Right Roaster coming in at 73 decibels, but from an auditory comfort level I do not feel as if I have to wear hearing protection around the Roasted Right Roaster whereas I do with the 3E. That being said, I still wear hearing protection around the Roasted Right Roaster to protect my hearing longterm. I know some have expressed concern that the Roasted Right Roaster would not have sufficient ability to remove chaff from the roast chamber given the lack of an external blower, but so far that has not been the case at all.
On the question of purchase price for roaster capacity, I think it is difficult to beat the Roasted Right Roaster. That being said, I think the purchase price has to be put into a more holistic perspective as there are a number of trade offs one has to be prepared to make that come in the way of fit and finish and aesthetics. The reason Marty is able to sell the roasters at a lower cost is because his costs are much less. He manufactures the roasters out of his home shop one at a time. He does not have a commercial manufacturing space with expensive manufacturing equipment, staff whose salaries he has to pay, etc. Since he does not have access to this precision equipment, there is a lack of standardization between roasters. There is a very real sense in which every Roasted Right Roaster is slightly different.
Customer service
The goal of this review has been to make this review as much as is possible about the Roasted Right Roaster and not about Marty, but customer service is an important aspect you must seriously consider before purchasing any roaster. I think a fare review would be that Marty has been very responsive to questions and extremely willing to help fix problems while at the same time often being defensive, abrasive, and slow to accept fault.
Would I recommend Roasted Right Roasters?
The answer is, “Yes, with qualifications.” If you have the time (major emphasis), tools, and a little bit of ability to repair equipment, then the Roasted Right Roaster is a budget friendly option you should seriously consider if you are in the market for a 6 kilo roaster. If not, you may be well served spending more money on another commercially manufactured roaster even if it means less capacity for more money. While Marty has assured me that my experience is a one-off experience, it could be your experience. You just have to know that going into it. Others have apparently had a much different experience. As mentioned, the roaster has lots of appealing features for the price point, but it comes with some risks. To be frank, the only reason the Roasted Right Roaster worked out for me was because the success of my business did not hinge on the Roasted Right Roaster working upon receipt.
If you are a profile roaster and you don’t want to take the steps I took to hear first crack, then this roaster is not for you. If you are an end temperature roaster, then you will likely be very happy with the roaster. I suspect most Roasted Right Roaster owners are end temperature roasters.
Lastly, for those interested in PID control of the roasting process, stay tuned. I will be adding PID control to the heat of this roaster and will put out an update soon.
